Input signal
Sequence Control Lesson
 Sequence Control Lesson
 Basic lecture
Input signal
Basic lecture
Input signal
First I will explain the sensor.I will use a photoelectric sensor.A photoelectric sensor emits a light beam from its light-emitting element.The photoelectric sensor responds by interrupting the light. Photoelectric sensors include thrubeam model and reflective model.
Thrubeam model
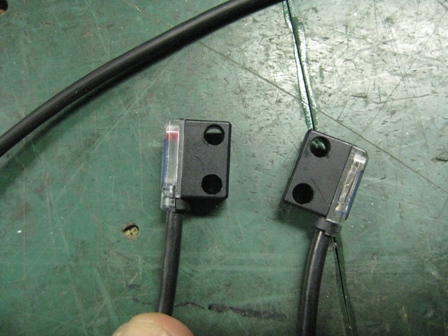
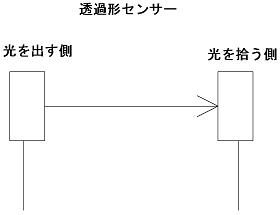
Light is emitted from one side of the transmissive sensor and received by the other.
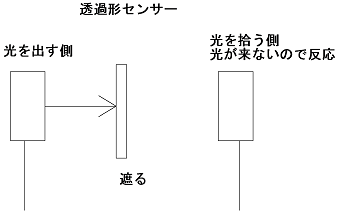
When light is blocked, the sensor on the right side can not receive light and the sensor reacts.In other words, if you set up a sensor in the aisle, it responds every time a person passes. The sensor divided into the light emitting side (Transmitter) and the light receiving side (Receiver) is called a transmission type sensor.
Reflective model.
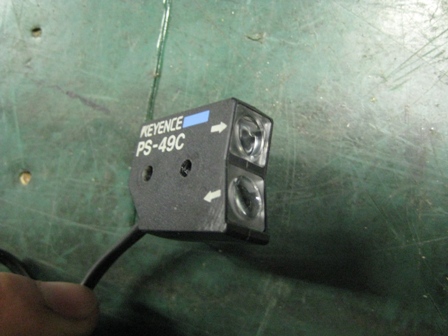
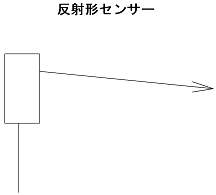
Reflective model is both the light emitting and light receiving elements are contained in a single housing.
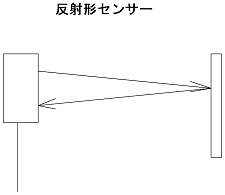
When you place an object in front of the sensor, light will be reflected and returned.The sensor receives the light reflected from the target.Detects objects with reflected light.
Which is better, reflective model or thrubeam model?I basically use a thrubeam model.It is because it is stable.If mounting is difficult, use reflective model.
Most applications of photoelectric sensors are "product" detection.Reflective model may not be stable depending on the color and distance of the product by necessity due to its characteristics.
This is my personal opinion.
Sensors have dark-on operation and light-on operation.Dark-on operation will output a signal when the light does not reach the light receiving side of the sensor. Thrubeam modelis when there is something between the sensors.Reflective model when there is nothing in front of the sensor.Light-on is the opposite of dark-on.
Wiring method of sensor.
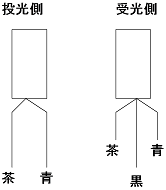
Brown is the positive polarity of DC.Apply DC24V here.Blue is the minus pole.The light emitting side (Transmitter) and the light receiving side (Receiver) are the same. The black line is the signal line.Japan is NPN output (sink output).I will explain with NPN output.
When the sensor outputs, the signal line is connected to the minus pole.In the case of PNP output (source output), positive is output from the signal line. Europe has a lot of PNP output.
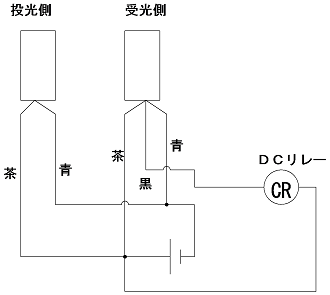
Always add "+" to the relay side. If there are multiple sensors, it is necessary to supply "+" to all relays.Then connect the minus side of the relay to the signal line of the sensor.
It is the reed switch of the cylinder.If the piston inside the cylinder contains a magnet and the cylinder advances, the internal piston also advances. The cylinder's reed switch reacts with the magnet.Therefore, it is judged whether the cylinder is currently moving forward or backward.
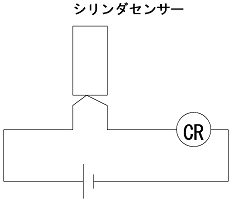
The connection of the reed switch is easy by choosing two lines.
It is a description of control from next time.
Relay control
This is a Japanese reference books.